User Tools
Table of Contents
GTKV2 Client Connection
A step by step guide to connecting to Crossfire servers using the GTKV2 client.
- Modern (trunk) servers using the client's character creation interface
- Older (branch) servers using the in game maps (Halls of Creation) for character creation
Modern (trunk) Servers
 - content with screen shots are a work in progress
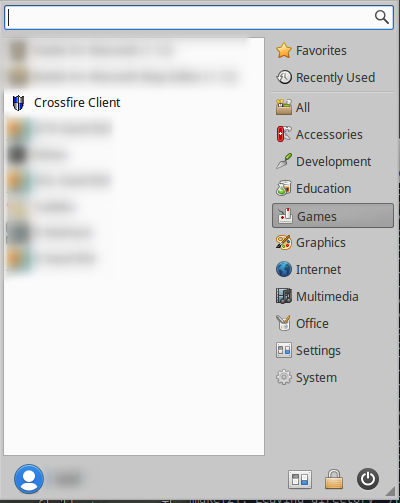
1. Launch the GTKv2 Client - the exact steps depends on which OS you are using and how it was installed
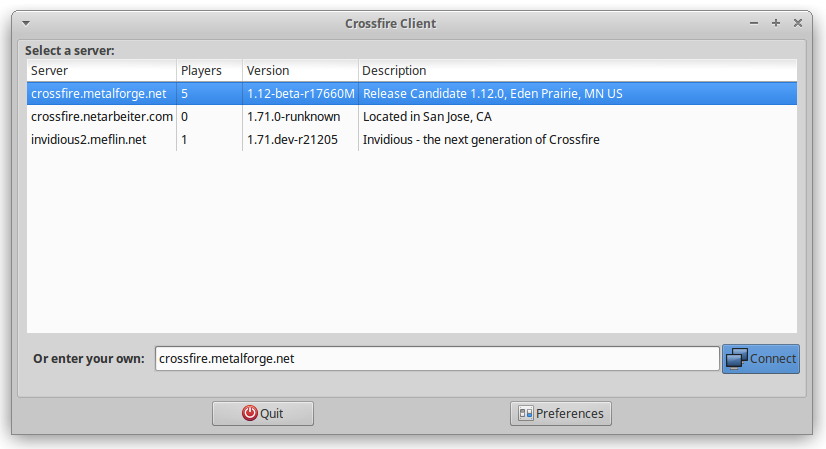
2. In the Metaserver selection window, all the currently available servers are listed.
- Servers with 1.12 in their version number are considered branch servers
- Servers with 1.50 and higher in their version number are considered trunk servers
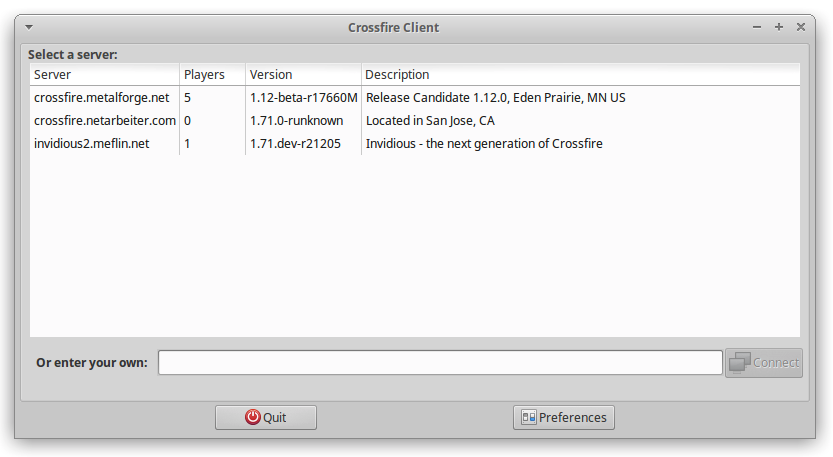
In this write up, we are connecting to a trunk server
- screenshot needed
3. Left click once to select the server you want to connect to and then click the Connect button
- screenshot needed
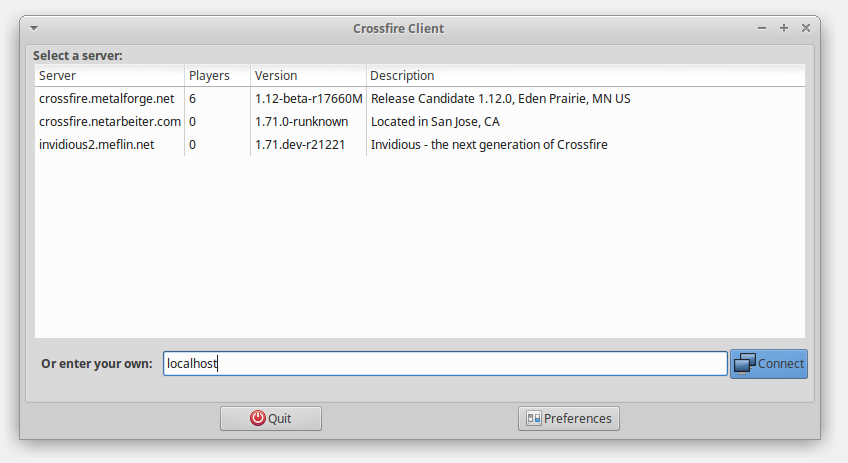
Or, you can also enter in a server name or ip address in the Or enter your own field for a server that is not in the metaserver list (such as localhost)
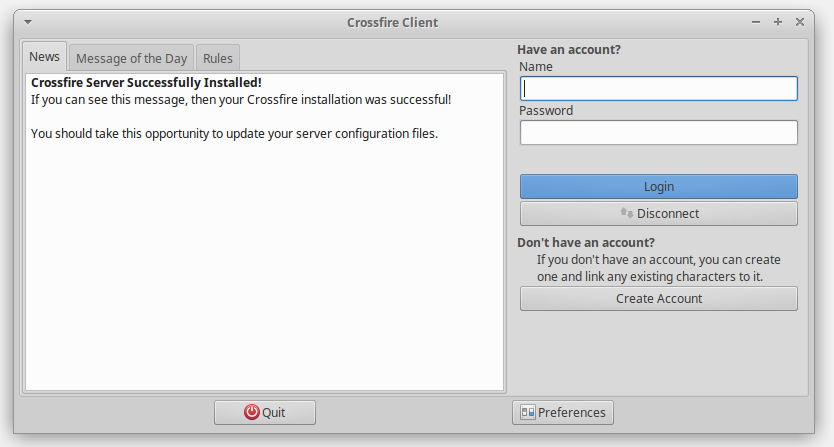
4. After connecting to a trunk server, you will see a window asking to enter your account information (if you have connected and played on this server before) or if you are new to the server - click the Create Account button instead and proceed to step 5
5. In the Create New Account window, you need to do the following:
- Name: This is your account name; this is NOT what people will see you as within the game. This is used to keep your account secure and a way to manage your player character profiles.
- Enter Password: This is the password that will help protect your character profiles and keep other people from accessing them.
- Make sure to chose a unique password that is not used anywhere else
- Make the password complex enough so that is not easily guessed
- Make sure you remember the password
- Confirm Password: Re-enter once again to make sure there are no typo mistakes with the first password entry
- Click on the Create Account button

6. You should now see the Choose a character to play window, click on the New button found towards the bottom left

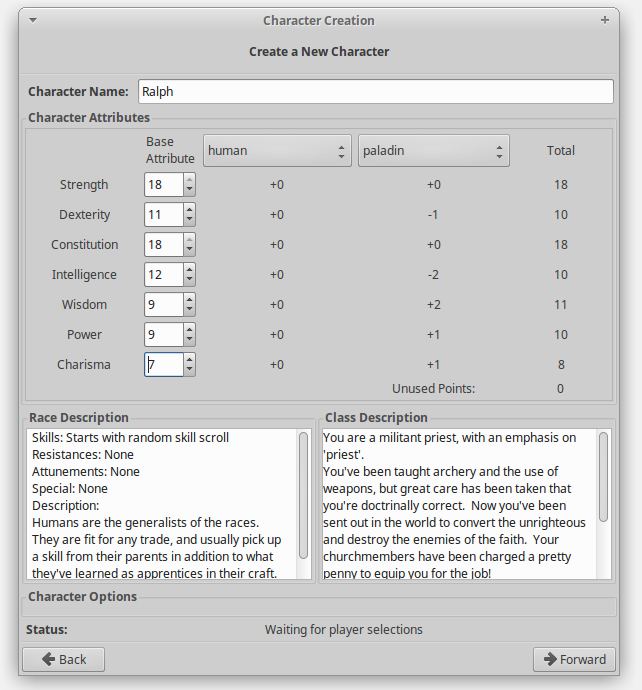
7. The Create a New Character interface will now appear
- Start with entering a name in the Character Name field
- This is the name of your character, what name they will use in the game, what other players in the game will see you as
- It can be a simple name, or contain a first and last name ( - confirm names can not start with special characters or numbers) NOTE: once in game, you can give yourself or adjust the default title of your character using the title command ( - link to the in game title command)
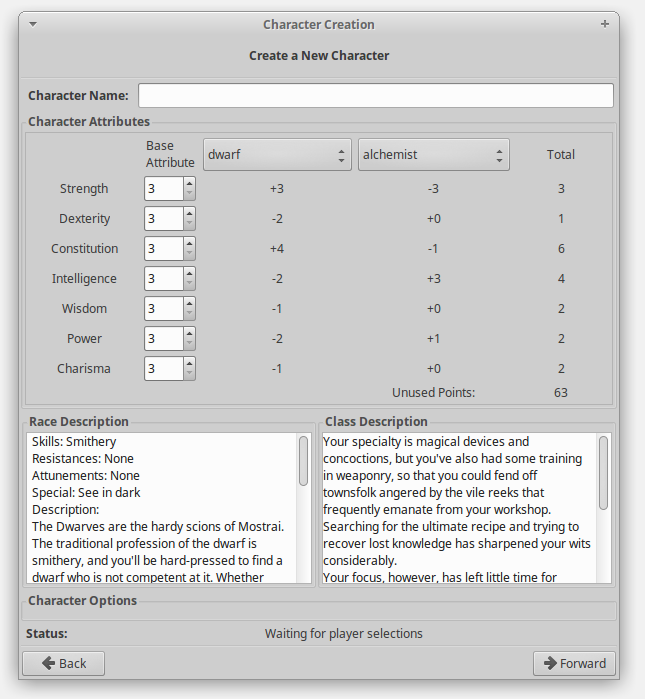
8. While still in the Create a New Character interface and in the Character Attributes section, perform the following steps:
- Base Attribute
- You need to 63 assign points (Unused Points shown in the middle right of the interface) to the available stats
- Minimum Base Attribute stat is 3
- Maximum Base Attribute stat is 18
- Race
- From the dropdown (which defaults to dwarf), select the race you want to play with your character
- Note in the column below the race dropdown menu, there are racial modifiers that affect the Total attribute score found on the right side of the window panel
- In game lore and other information about the selected race apepars in the lower left of the interface window
- Class
- The other dropdown (which defaults to alchemist), select the class of your character
- Note in the column below the class dropdown menu, there are modifiers that affect the Total attribute score found on the right side of the window panel
- In game lore and other information about the selected class apepars in the lower right of the interface window
- Total
- This is the grand total of all points, racial modifiers and class/profession modifiers and the final stat score of your character once they enter the game
- This total can exceed 18
- This total must be 1 or higher
- Unused Points
- All 63 points must be used so the total shown here must be 0 (zero) before you can proceed to the next step
- If you have too many points allocated, this number will appear as a negative (i.e., -2) and you will have to adjust the Base Attribute numbers accordingly before proceeding
- Character Options
- Specific information will display here for only some of the character races, such as elemental focus for a dragon character
- Status:
- Displays where you are at with the character creation process or if there is a problem
When finished, click on the Forward button in the lower right
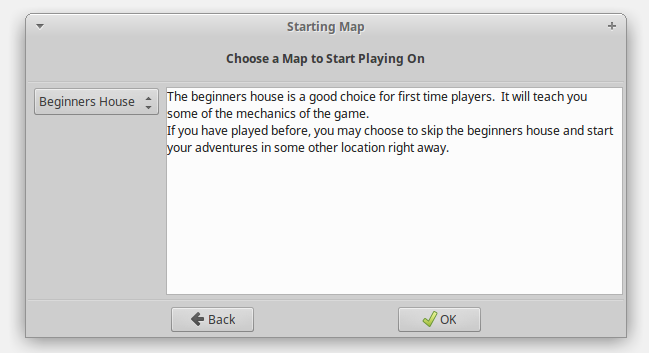
9. The next step is to pick a Starting Map, in the dropdown on the left you are prestend three options to chose from
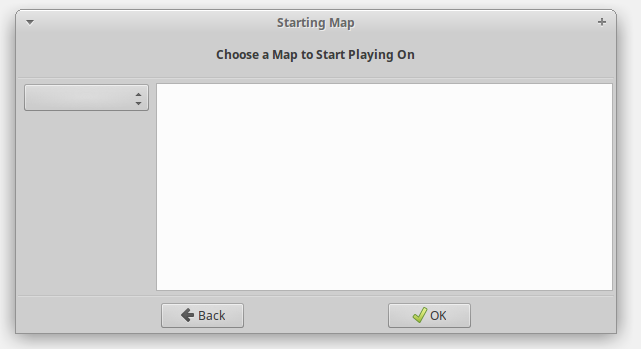
- The options include
- Beginner's House
- Tutorial map that is unique to your character, if uncertain on what to do select this map
- Scorn
- New player starting city, does have some advanced dungeons within the city limits
- Navar City
- Intended more for the advanced or experienced player


After Logging Out
1. After applying a Bed to Reality to safely leave the game, the client will display the character selection window - click on the Quit button to close out and exit the client

Logging Back In
1. When you are logging back in to the server or are ready to play again, select the same server again in the Metaserver window and enter your Name and Password that you used in Step 5 above

2. You will now see all your available characters, left click on one of them to select them (they are now highlighted in some color depending on your desktop theme and other settings) and then click on the Play button

You should now be back in the game at your last used Bed to Reality
Older (branch) Servers
1. Launch the GTKv2 Client - the exact steps depends on which OS you are using and how it was installed
2. In the Metaserver selection window, all the currently available servers are listed.
- Servers with 1.12 in their version number are considered branch servers
- Servers with 1.50 and higher in their version number are considered trunk servers
In this write up, we are connecting to a branch server
3. Left click once to select the server you want to connect to and then click the Connect button
You can also enter in a server name or ip address in the Or enter your own field for a server that is not in the metaserver list
4. Screen shot is focused on the areas of the client that you are interacting with for the character creation process.
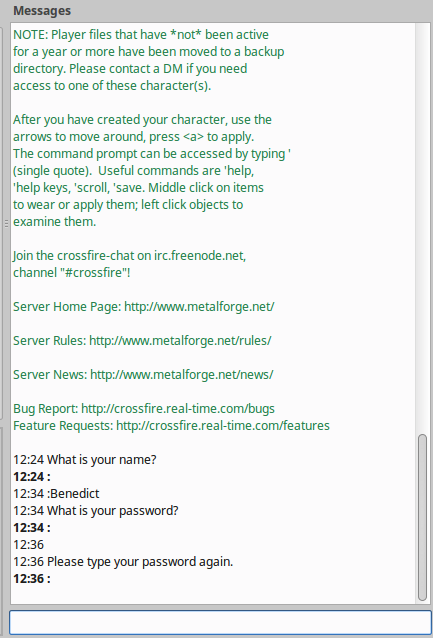
First step is to enter in the name of your character; this is what other players will see you as from within the game.
In this example the character's name is: Benedict

5. Next, you will be prompted to enter a password.
- Make sure to chose a unique password that is not used anywhere else
- Make the password complex enough so that is not easily guessed
- Make sure you remember the password
If you see a prompt to Please type your password again
- This means the character name is not in use and that name is now use, so enter your password again
- what is shown if the character name is already in use?
6. You now are prompted to select character stats
Your stats are located at the top of the client
The random stats are a minimum of 3 and maximum of 18; highest numbers are listed first and then sequentially decrease after that
To roll again, hit the “y” key (you can reroll as many times as you want)
If you are pleased with the stat numbers presented, hit the “n” key
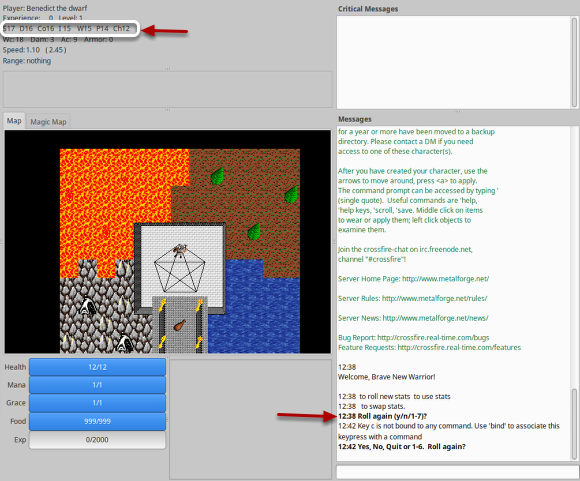
7. To swap stats, you first hit a number key for the first number and then hit a second number to swap that stat with; See the next step for the example:
- S = Strength = listed first
- D = Dexterity = listed second
- Co = Constitution = listed third
- I = Intelligence = listed fourth
- W = Wisdom = listed fifth
- P = Power = listed sixth
- Ch = Charisma = listed seventh

8. In this example, we are switching Strength (S17, listed first) with Intelligence (I15, listed fourth). So I hit the “1” key to select strength and then hit the “4” key to select Intelligence.
When finished with the stat swapping, hit the “n” key.

9. You are now in the race select process. you can scroll through the options as many times as you like. The client will display game lore about the race as you cycle (press any key to advance, press 'd' key to play the currently active/displayed race) through the options.
The stats will also update to reflect the racial modifiers (bonuses and penalties), at this point it is possible for the stats to exceed 18 and also get reduced to 2 or 1 as well.
The order of races is:
- Dwarf
- Elf
- Fenx
- Fireborn
- Gnome
- Halfling
- Human
- Northman
- Dragon
- Half-Orc
- Quetzalcoatl
- Serpentman
- Troll
- Wraith
- Link to race summary and suggestions pages
When you have the race you want to play selected, hit the 'd' key and then hit the enter/return key as well

10. You are now controlling the character and you can use the arrow keys for movement, but it is recommended to use the numeric keypad because that gives you quick access to the diagonal movement keys.
Head south (down arrow, or 2 key on the numeric keypad) for in game instructions and other advice.
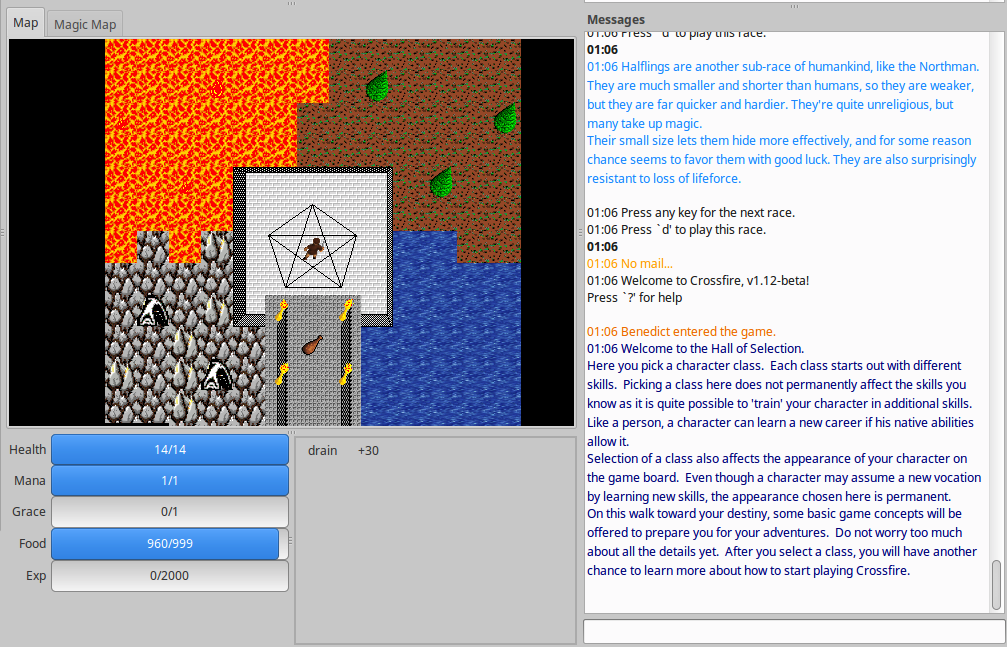
11. You will enter the class selection area. In the first step in each fenced hallway you get a description and summary of the class. Step on the yellow disk to make the final selection of that particular character class.
- map layout and class name and summary

12. After selecting your class, you are now teleported to a map called “Nexus” and have some choices.
- Starting House - located due north (up) of your starting position, and this is a unique tutorial map for to learn about the game
- Navar - located due east (right) of your starting position, this is a location in the game world that is slightly more advanced and for the more experience player
- Scorn - located due west (left) of your starting position, this is a location in the game world that is designed more for new and lower level players. NOTE: you have to demonstrate some game knowledge proceed to Scorn.
If uncertain on what to do, enter the Starting House map.
